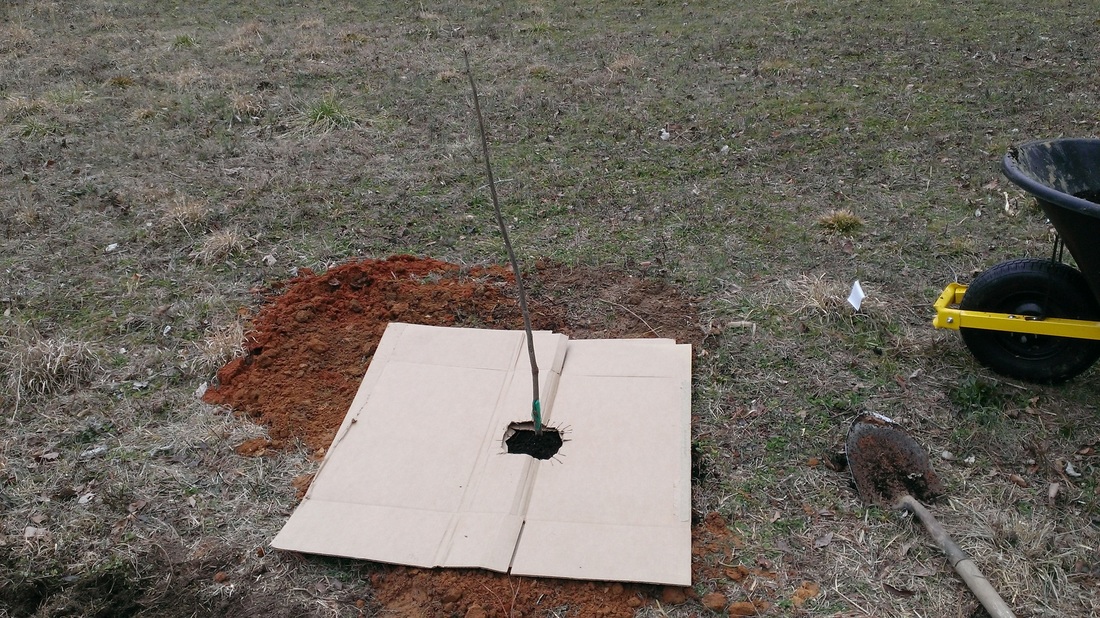
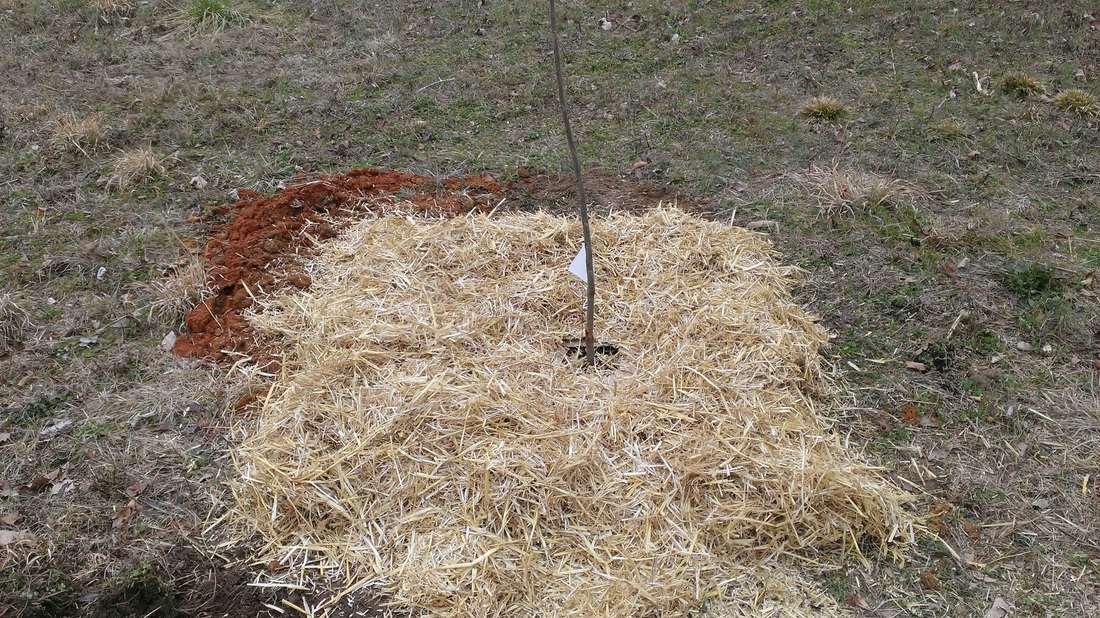
 We ordered enough bare root trees to plant a new row on the flat terrace between the swales. As you see above the trees were planted and given a couple of shovels of compose as a top dressing. Then we added some straw on top of that. After the straw was place around each tree we went back and added cardboard down the entire row. Unlike the top dressing of compost and straw the cardboard was not just around the tree but between the trees also. 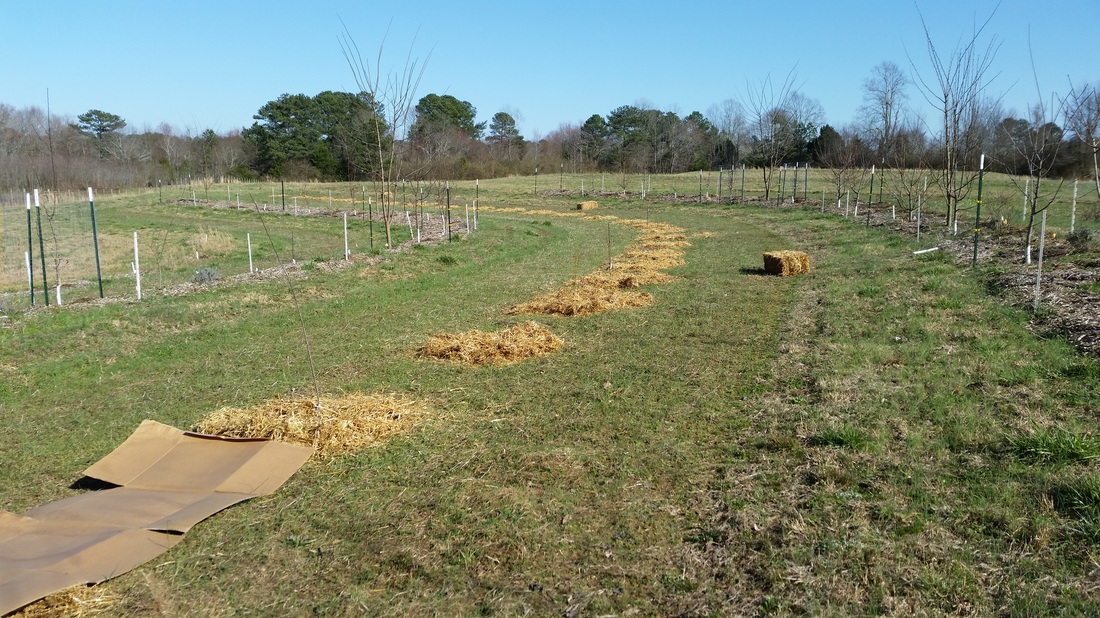 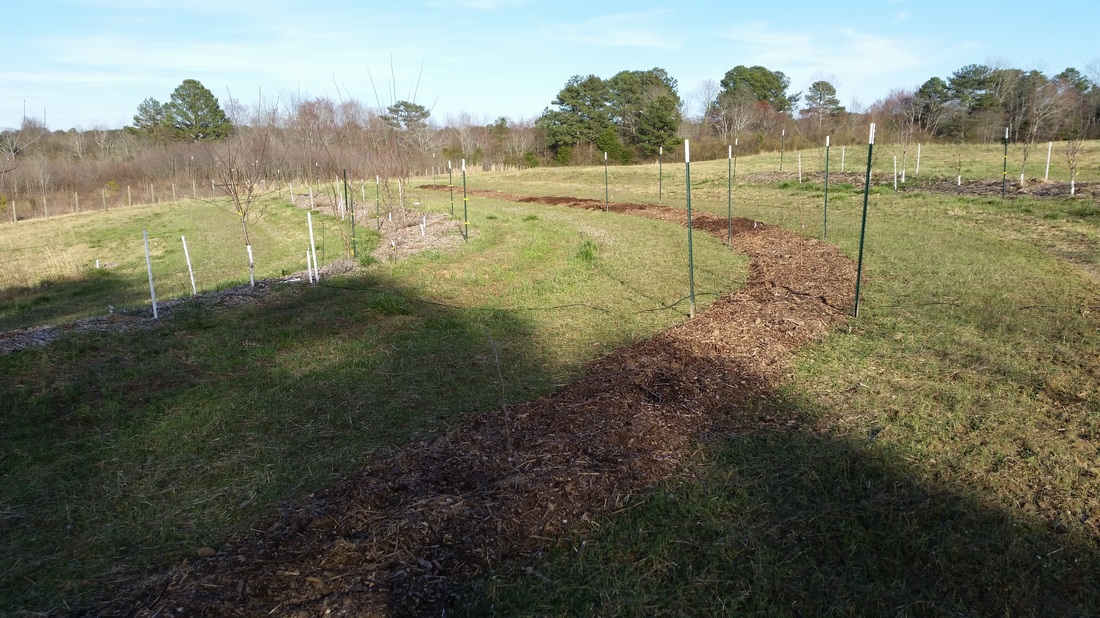 Once we had at least two layers of cardboard down over the entire row we added a layer of wood chips on top of the cardboard. Most places the wood chips are about 4 inches deep but some places it is a little deeper. I would guess no deeper than 6 inches. After all the chips are in we added some deer protection. We spaced out some tee post then filled in the gaps with some step in electric fence post.  The final step is stringing some wire and hooking it up to the hot wire to energize it.
0 Comments
Putting in honeybees for pollination and honey production on my Huntsville area regenerative homestead.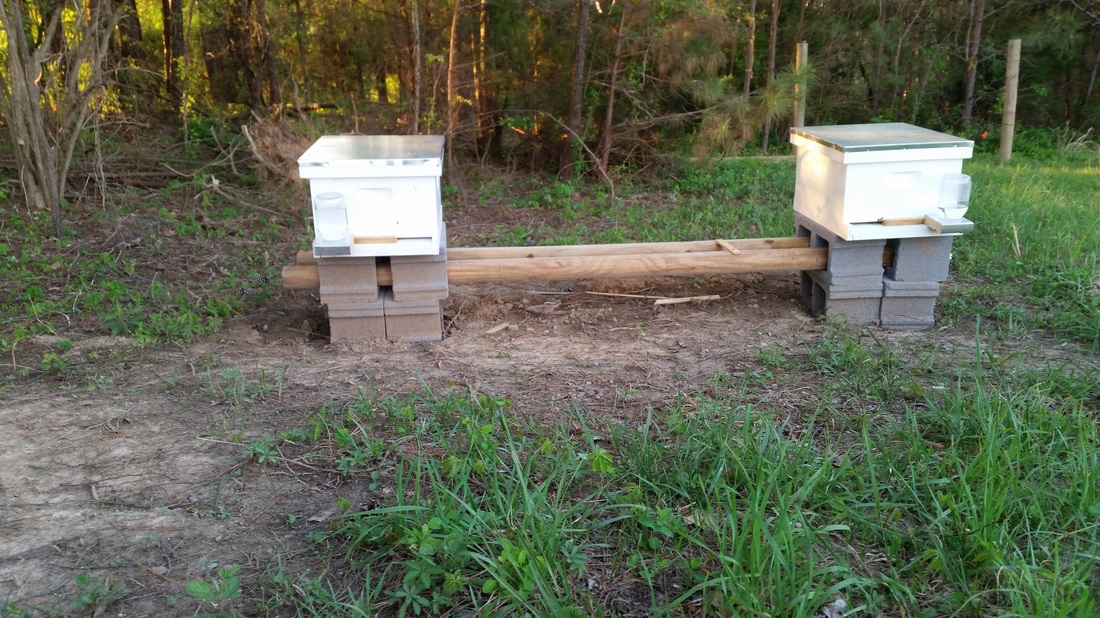 This was my first attempt at beekeeping. I attended a some classes put on by the local honeybee association during January and February. There I meet some very helpful people that pointed me in the right direction on purchasing my bee packages. A package has 3 to 5 pounds of bees and a queen in it. As you can see in the picture above I started with two hives. I thought they were doing great drawing out new comb on the foundations but I lost one after I put on the next box. I managed to keep the other one going good and was excited to be coming out of this winter with what I thought was a strong colony. Some where this past month I messed up and sadly lost the other colony. I believe it was from feeding the bees from the top of the hive. It appears that the jar leaked out on the bees somehow. I had added another deep last summer and it is full of honey. To be honest I am not sure what went wrong. I am not giving up though. I plan on starting out this spring with 4 hives. I will add another two next to the two in the picture above. What can I do with all that honey that is in the last one that I lost. I will find out if I can use it for the new bees and let you know how it worked out.
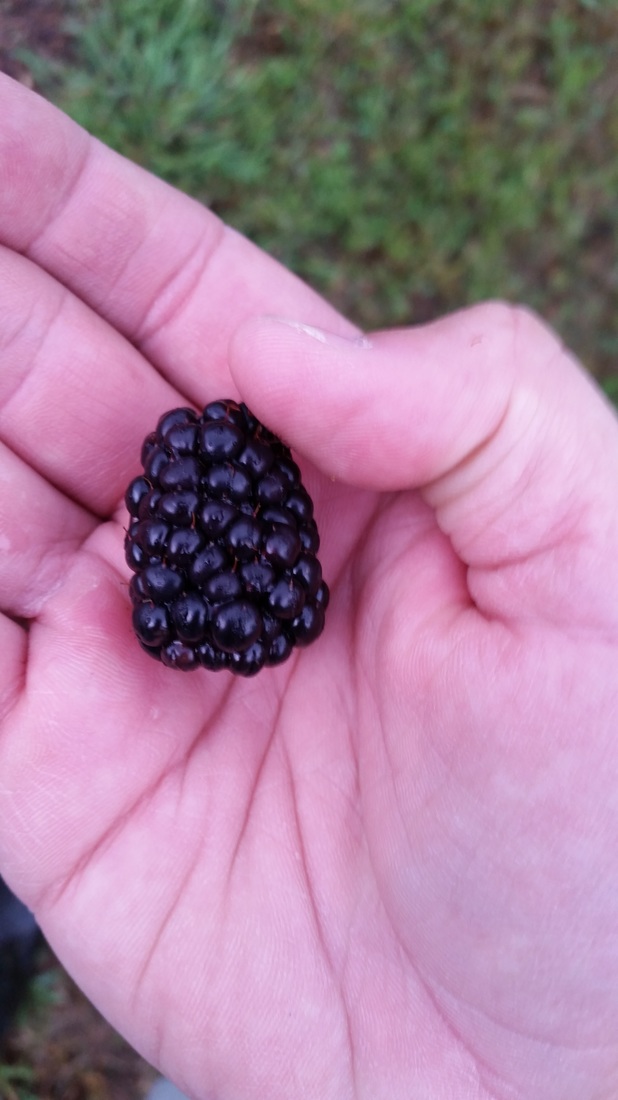
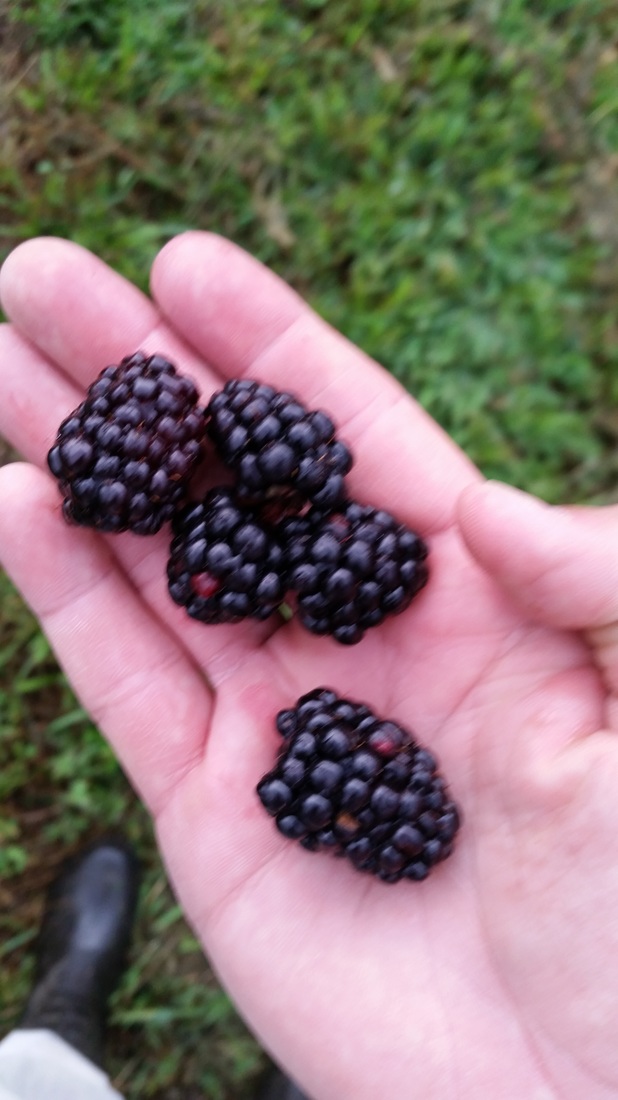
U-pick blackberry plot about 1/4 acre started on my Huntsville area orchard/farm homestead. Plan to expand to 1/2 acre in time.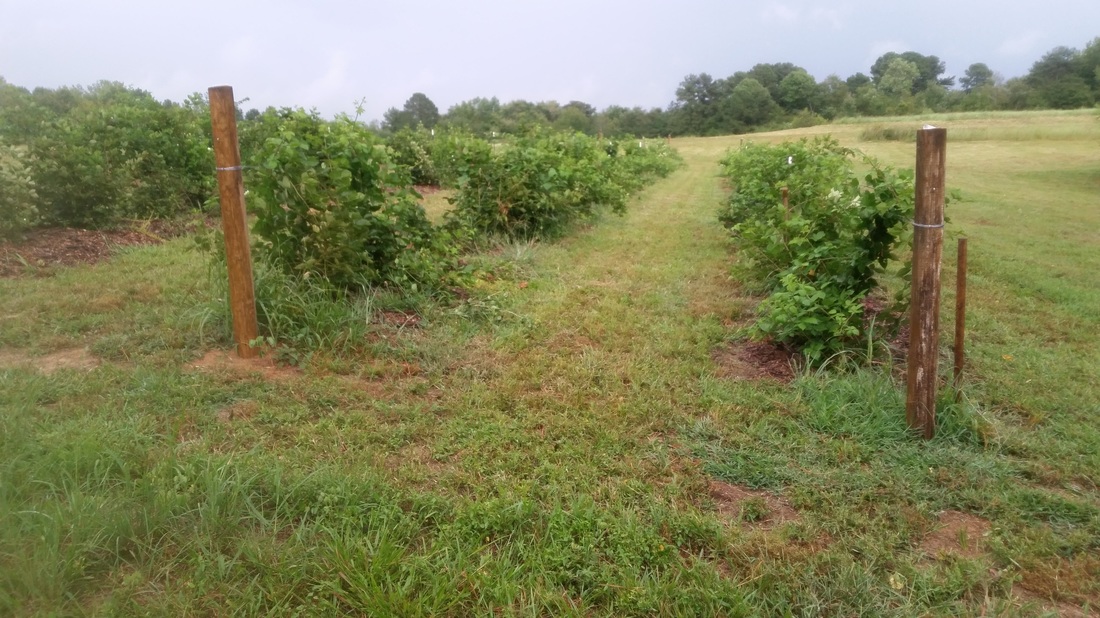 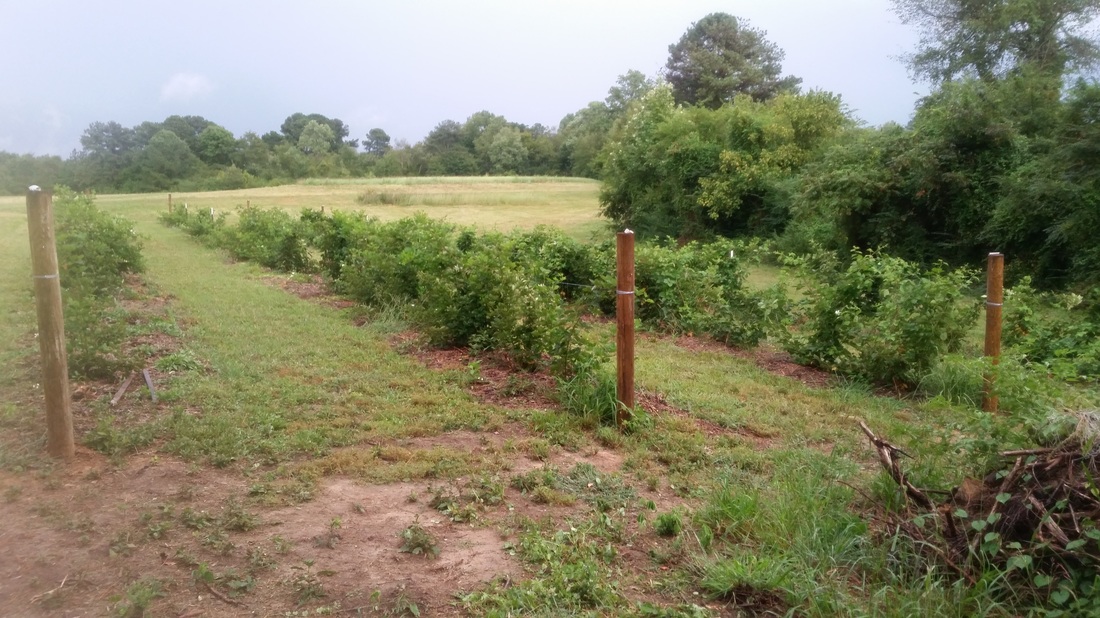 I planted Primocane Blackberries. Their canes will almost stand up on their own. I used 5" round 8' post as end support with 5' teepost every 30 feet. I then wrapped a wire and ran it down the row wrapping each post until I got to the other end. I wrapped it around the end post and turned around running the wire back to the post where I started wrapping it around the teepost as I returned also. This gave me a loop to pull the blackberry canes through as they grew. My rows were 150' and I planted blackberry plants every 3 to 4 feet. I planted these last year in the spring and this was one years growth. The pictures were taking this past fall. The plants were only about 3 to 4 inches tall when I planted them. They put on a few blackberries last fall. See the picture below. I hope to market a upick next year. This year I will let all my coworkers and friends help me keep them picked.
Making use of the space between the trees. Growing vegetables on a regenerative orchard and farm near Huntsville, AL.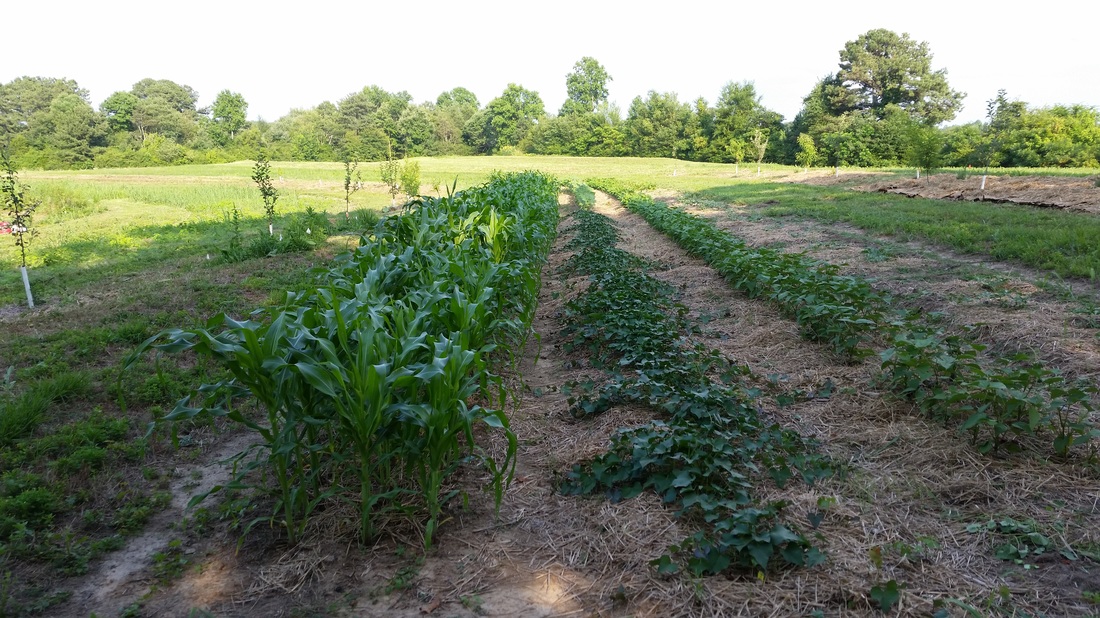 The sweet potatoes next to the corn there were the best I have ever had. 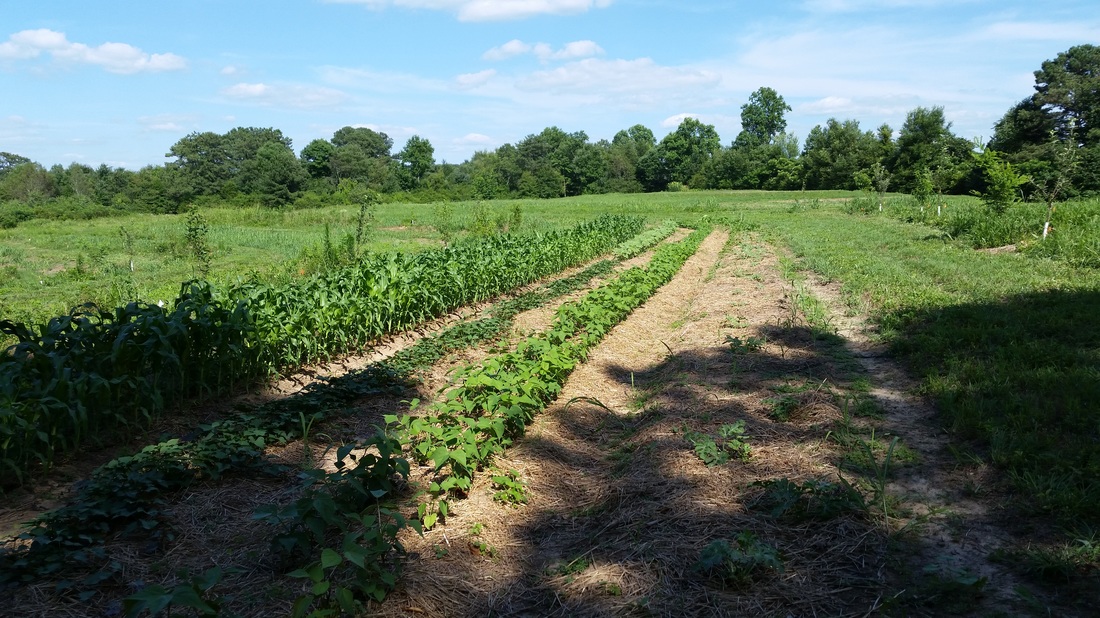 If you look to the right at the fruit trees you will notice that they are clear of grass where I had put cardboard around them. Look at the picture below and you will notice that I decided to cardboard and mulch all the space between the trees. 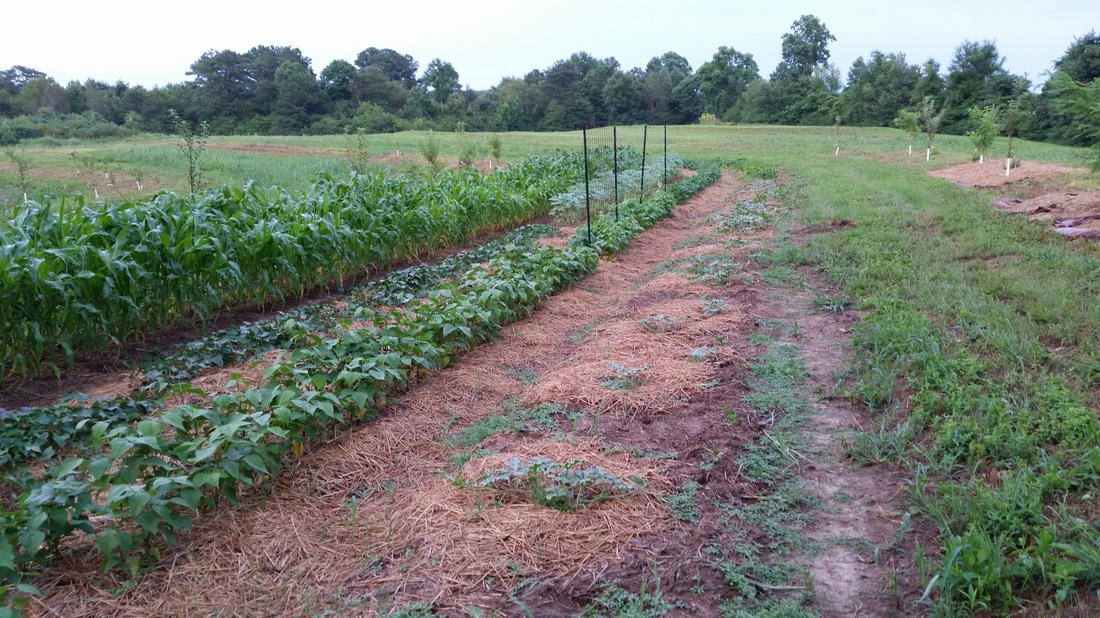 Notice the 4 tee post, I had planted a small section of pole beans and used those to make a trellis out of jute twine.
Using the space between the trees on a Huntsville area orchard and farm. Building a regenerative agriculture homestead.Getting it cleared. We used a tractor with a tiller to get the land broke. Remember it hadn't been touch for may years. Looking back at Google Earth history it appears to have been only mowed for 10 years plus. 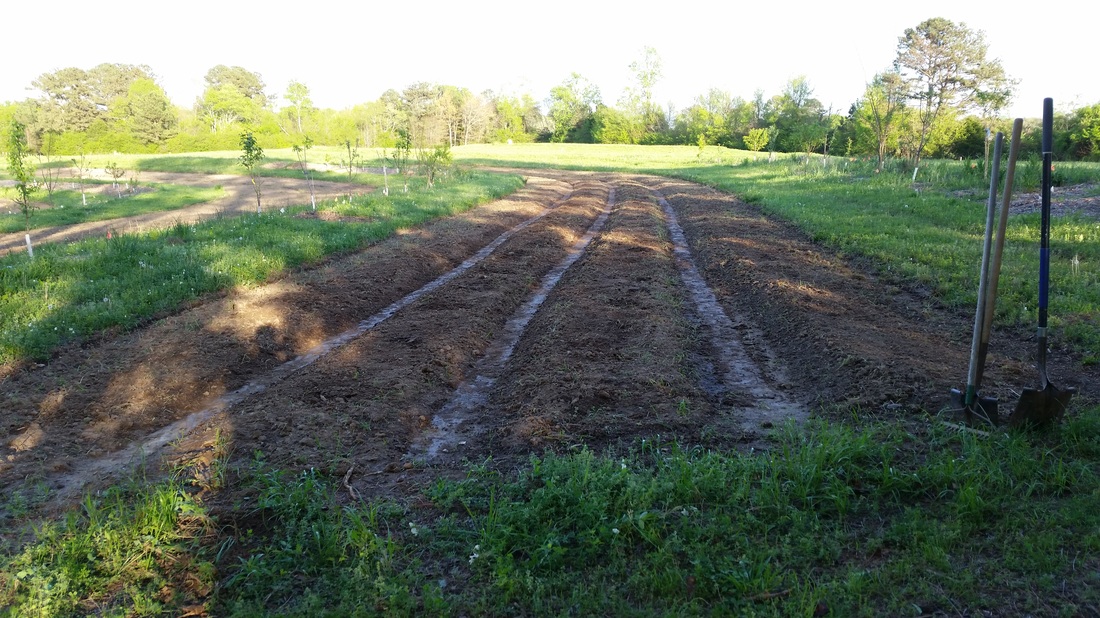 Making the rows and mulching the walkways. We had though that we would go no till in the future so we made mounds. This was a good idea but we didn't keep the mounds last year. We have started planting trees on the lower terrace. I will show that soon. 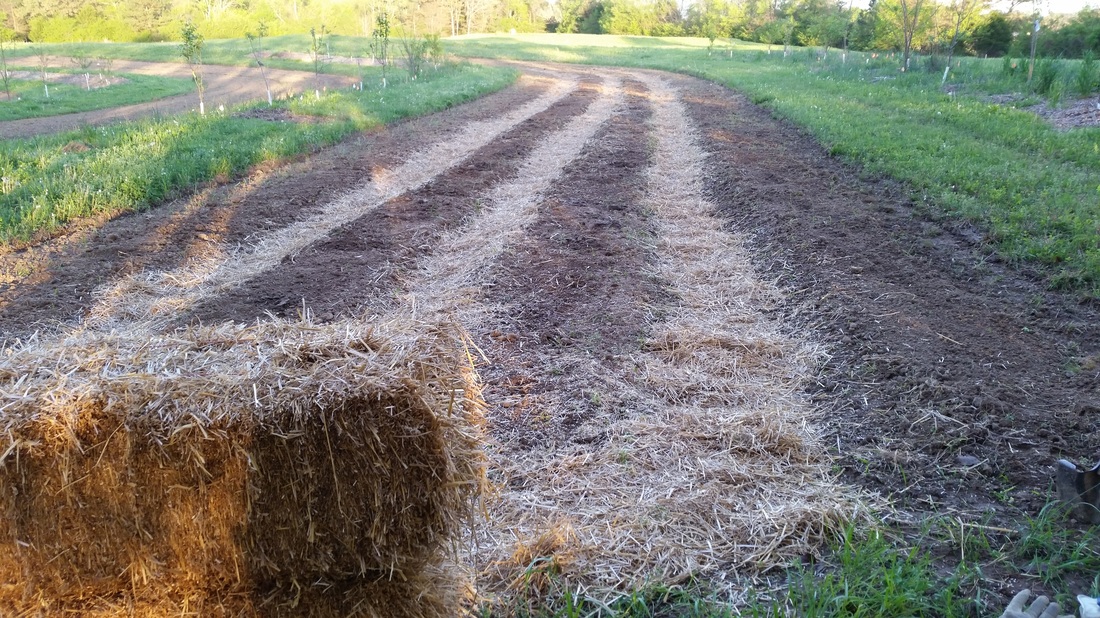 Laying out the rows and putting seeds in the ground. This worked good for some things like beans, peas, squash and potatoes. We found that some thing like corn didn't do well for use in long rows. 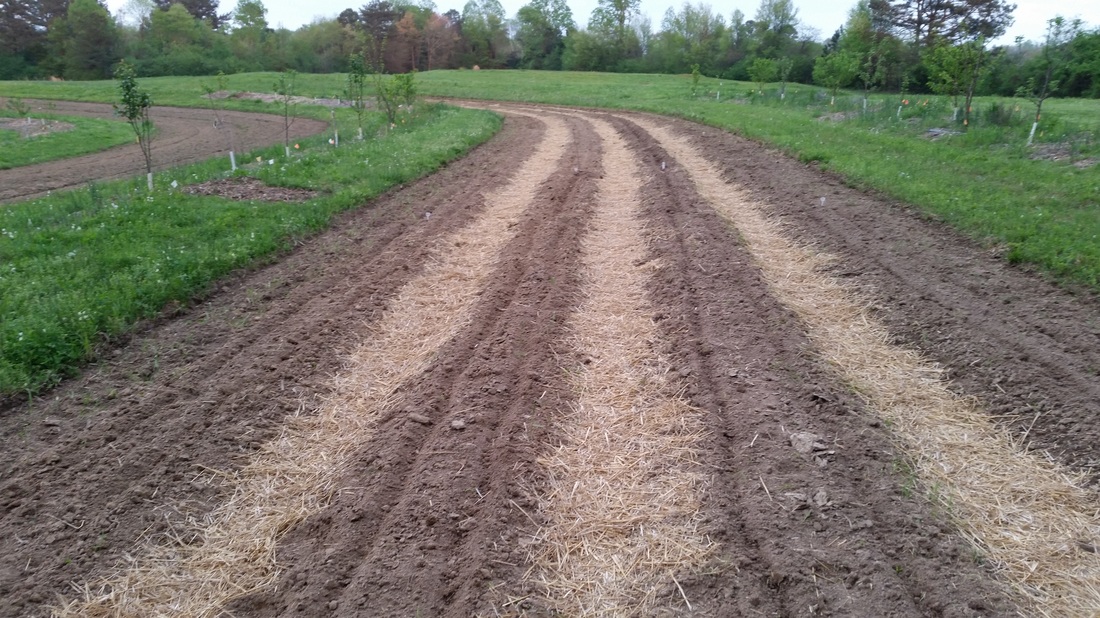 Thing we learned. The mound really helped. They were on contour so water went into the ground and if kept weeded with a good layer of straw in the rows the garden was easy to pick. Not exactly sure how we will put in annual vegetables in the future but going no till with mounds between tree rows might be it.
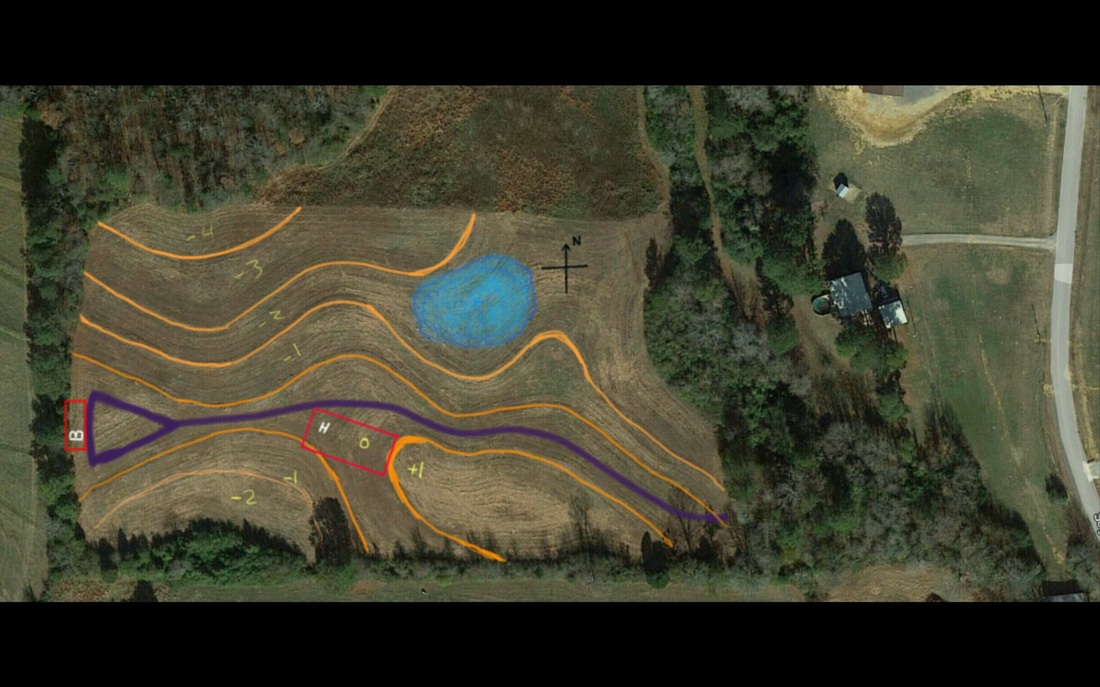 Designing my homestead. A Huntsville area orchard and farm. There are lots of free ways to get a big picture overview of how you would like to develop your land. I used Google Earth. It has features like a tape measure and elevation. I also use tools that came preloaded on my tablet. This image is from sketchbook. I placed lines for contour and blue spot where I wanted a pond. Purple is my current road and the red boxes are where I would like buildings. This allowed me to plant trees and berries in spots that would not be in the way of future permanent structures. So I am jump starting my orchard and berry patch before moving on my homestead.
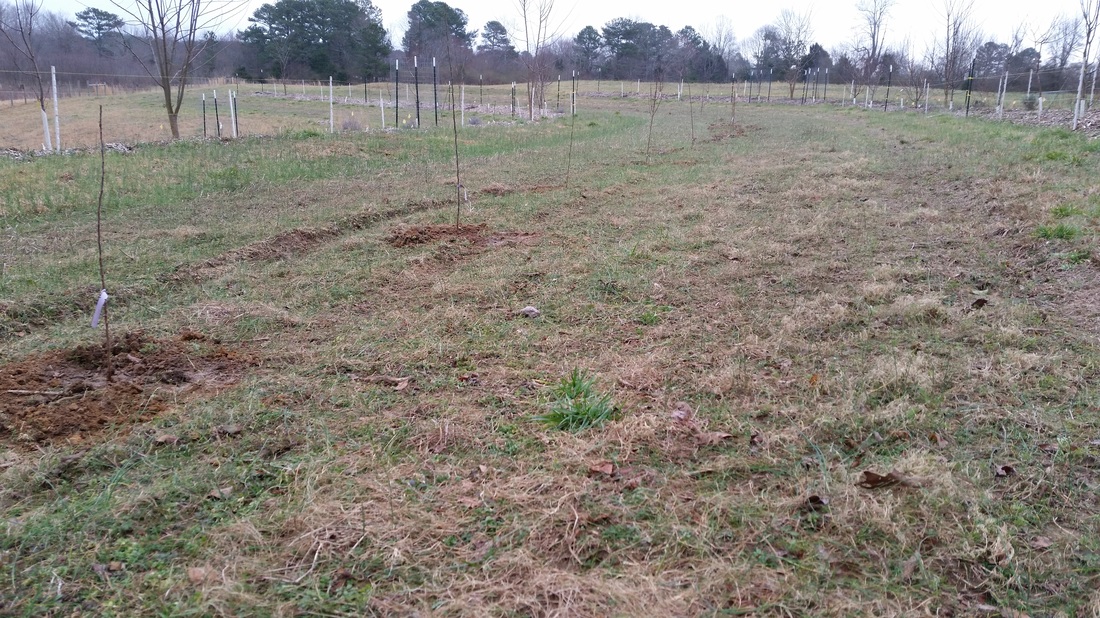
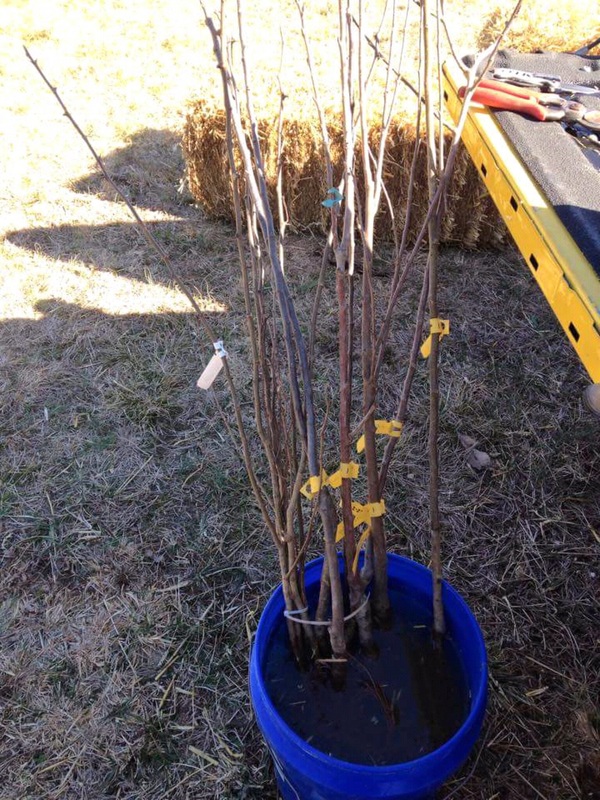 This is what my bare root trees looked like after unpacking them from the box they came in. They were wrapped in bubble wrap with a gel that provided the roots water during shipping. I haved 4 bundles like this on my first order and planted them 2 days after they were delivered. It was my first time getting bare root trees. Following the instructions, I soaked the roots for a couple hours before planting them. After watching a few hours of online videos on how to best plant trees, I decided to go with the minimum soil amendments. I had a little compost and added it to each tree but mostly used native soil. I dug a hole deep enough for the roots depending on the type of tree with a few inches of loose dirt all around. I then covered the roots ensuring that not to cover any graft unions. With lots of though I decided to go with short stakes for support. There were many "experts" on the internet with every correct stake height but I decided on the low stakes. My thought was this would promote thicker more supportive or natural trunks. I planted about 50 trees on the first round and all but one stayed up straight. The only one that had a problem was a black locust that grew so fast that first year I think it out grew its roots. I pulled that one tree back in place and staked it with a t-post and it is growing good now. I must say that the bare root trees from a nursery have out paced all the big box potted trees. I have continued to purchase bare root and planted them all this way. This works best for me.
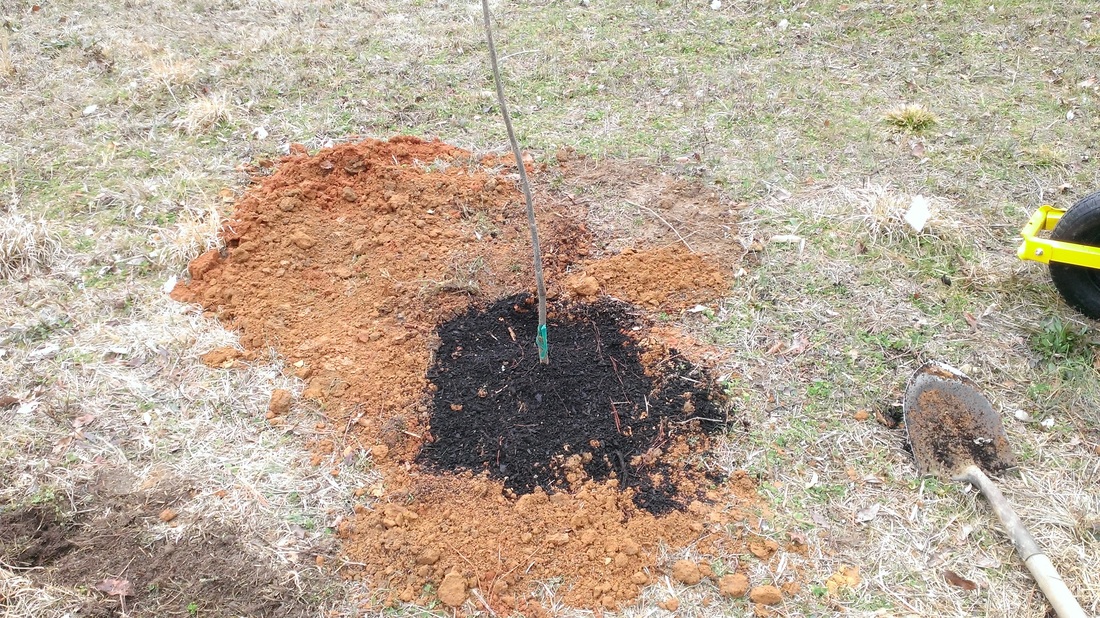   Our fist goal was to get some trees in the ground. First we decided where we wanted our buildings and ponds. The next step in our design was to decide on how things should be planted. I wanted to utilize the water catching effects of the terrace swales. This was important because I don't have a usable water source on the property yet. We decided to plant the swales on the north west side of the property. We started with fruit trees and support trees. We picked a good mix of fruit trees and put in an order from a local nursery. Most of the trees were bare root trees. For support trees we chose black locust. Locust are a legume. Legumes put nitrogen in the ground. Locust also have a beautiful smelling flower that the bees love. We couldn't afford to get all the trees we wanted to start with. We got what we could afford at the time. After planting, we top dressed all the trees with compost followed by a couple layers of cardboard then straw on top. This how we started. I later watched a film by Stefan Sobkowiak called "The Permaculture Orchard: Beyond Organic". I wish I had watched that first but it wasn't out when I started. I will try and follow his basic ideas in all future plantings. Each terrace has multiple types of fruit trees. The first planting had pears, apples, peaches, nectarine, persimmon, plums, mulberry, fig, cherry, apricot, asian pear, blueberries and loquat. Not all of them did good and some were eaten by the animals but most are thriving. We learned the hard way that we had to wrap the trees with guards. That didn't stop the deer. I am still working on that problem. I will get some before and after planting pictures out next.
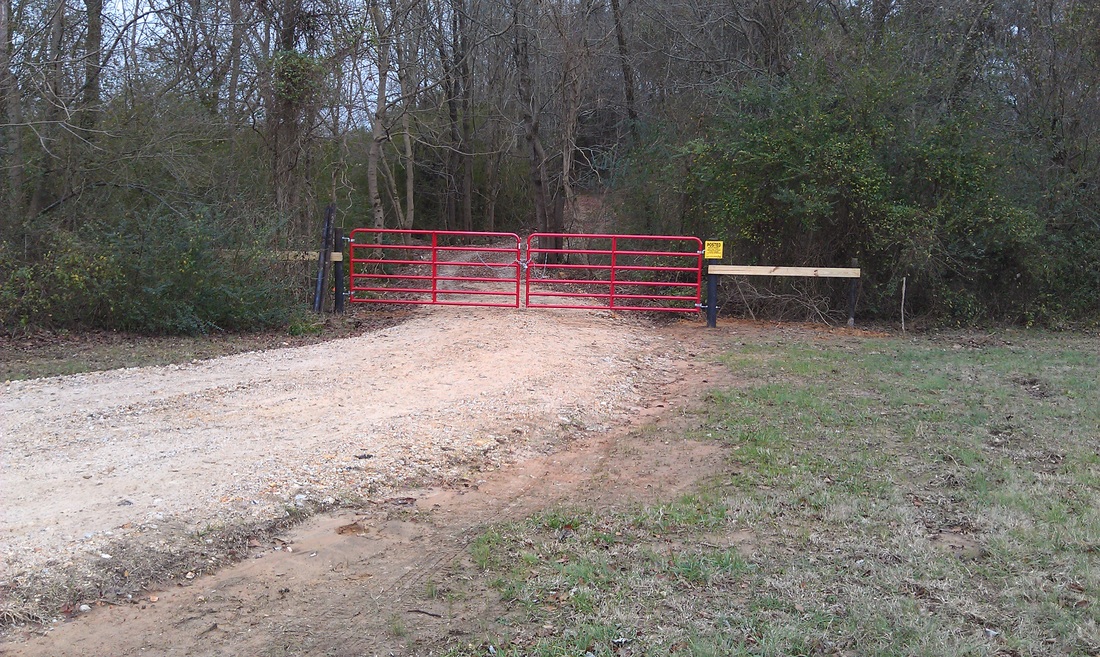 Our makeshift road wasn't very good. So, we had a proper drainage tile put in and a dump truck load of clay packed on the road. Not long after we noticed unwanted traffic through our woods and on our land. No real damage, just few empty cans. We had to put a fence in sooner than we wanted. This is our temporary fence. We put it in 5 months after purchasing the property and we are still using it.
Once it was mowed we need a way to access it besides the neighbors yard. We used flags and to mark out a road through the woods that would allow us to save most of the bigger trees. Then I cleared it mostly with a bush axe and machete. I did have some help with the big trees. My father-in-law has a chainsaw and was nice enough to help me the big ones.  There is a wet weather creek that runs across the front wooded part of the land. At first I constructed a makeshift bridge out of center blocks and wood. This worked fine for a while but eventually the center blocks broke and had to be replaced. We made due until we could afford to purchase some drainage tiles and clay for fill. 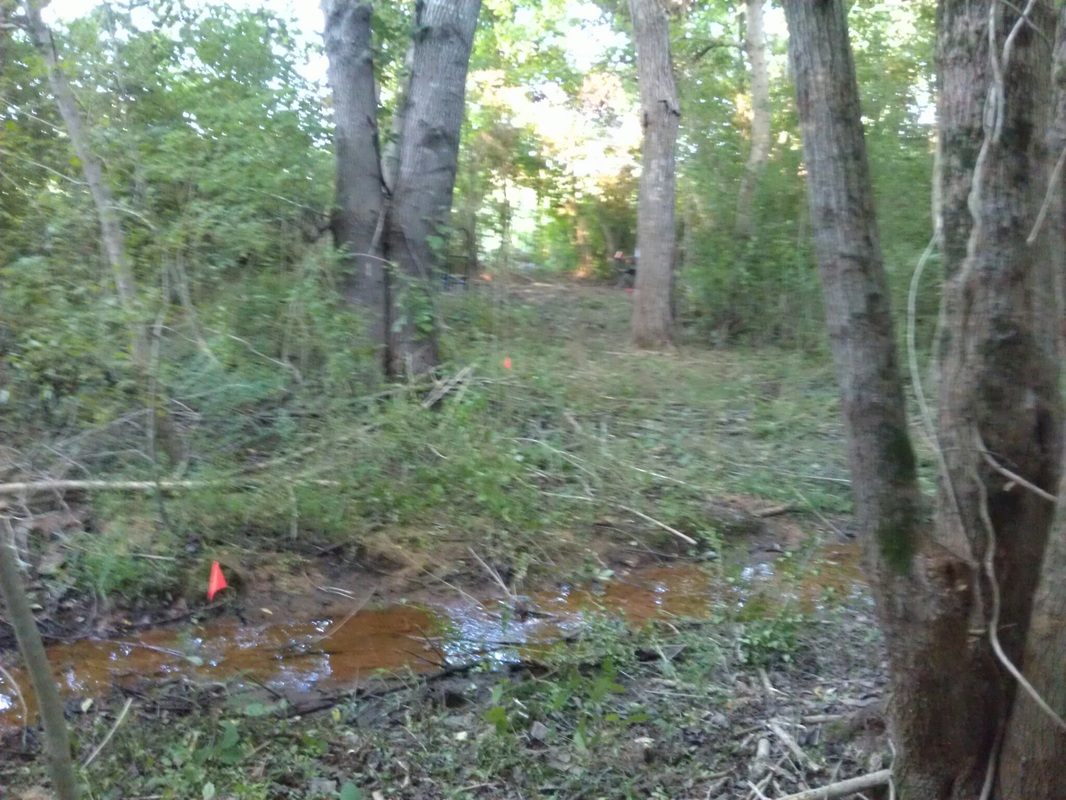 |
Kevin HarrisI'm building a working homestead with the intent that it will provide health food for my family and yours. This will be a place for you to come pick your food and connect with where it was grown. Archives
February 2017
CategoriesComing Soon
|
 RSS Feed